Guide
From first connection to everyday features, step by step.
Most people only need to follow this order. For the harder networking details see Technical & Security, and when something isn't working, check Help separately.
5-minute setup
For your first connection, just follow this order.
This assumes Wi-Fi (the same router). The only thing you need to turn on is the Accessibility Service.
Open the PC app
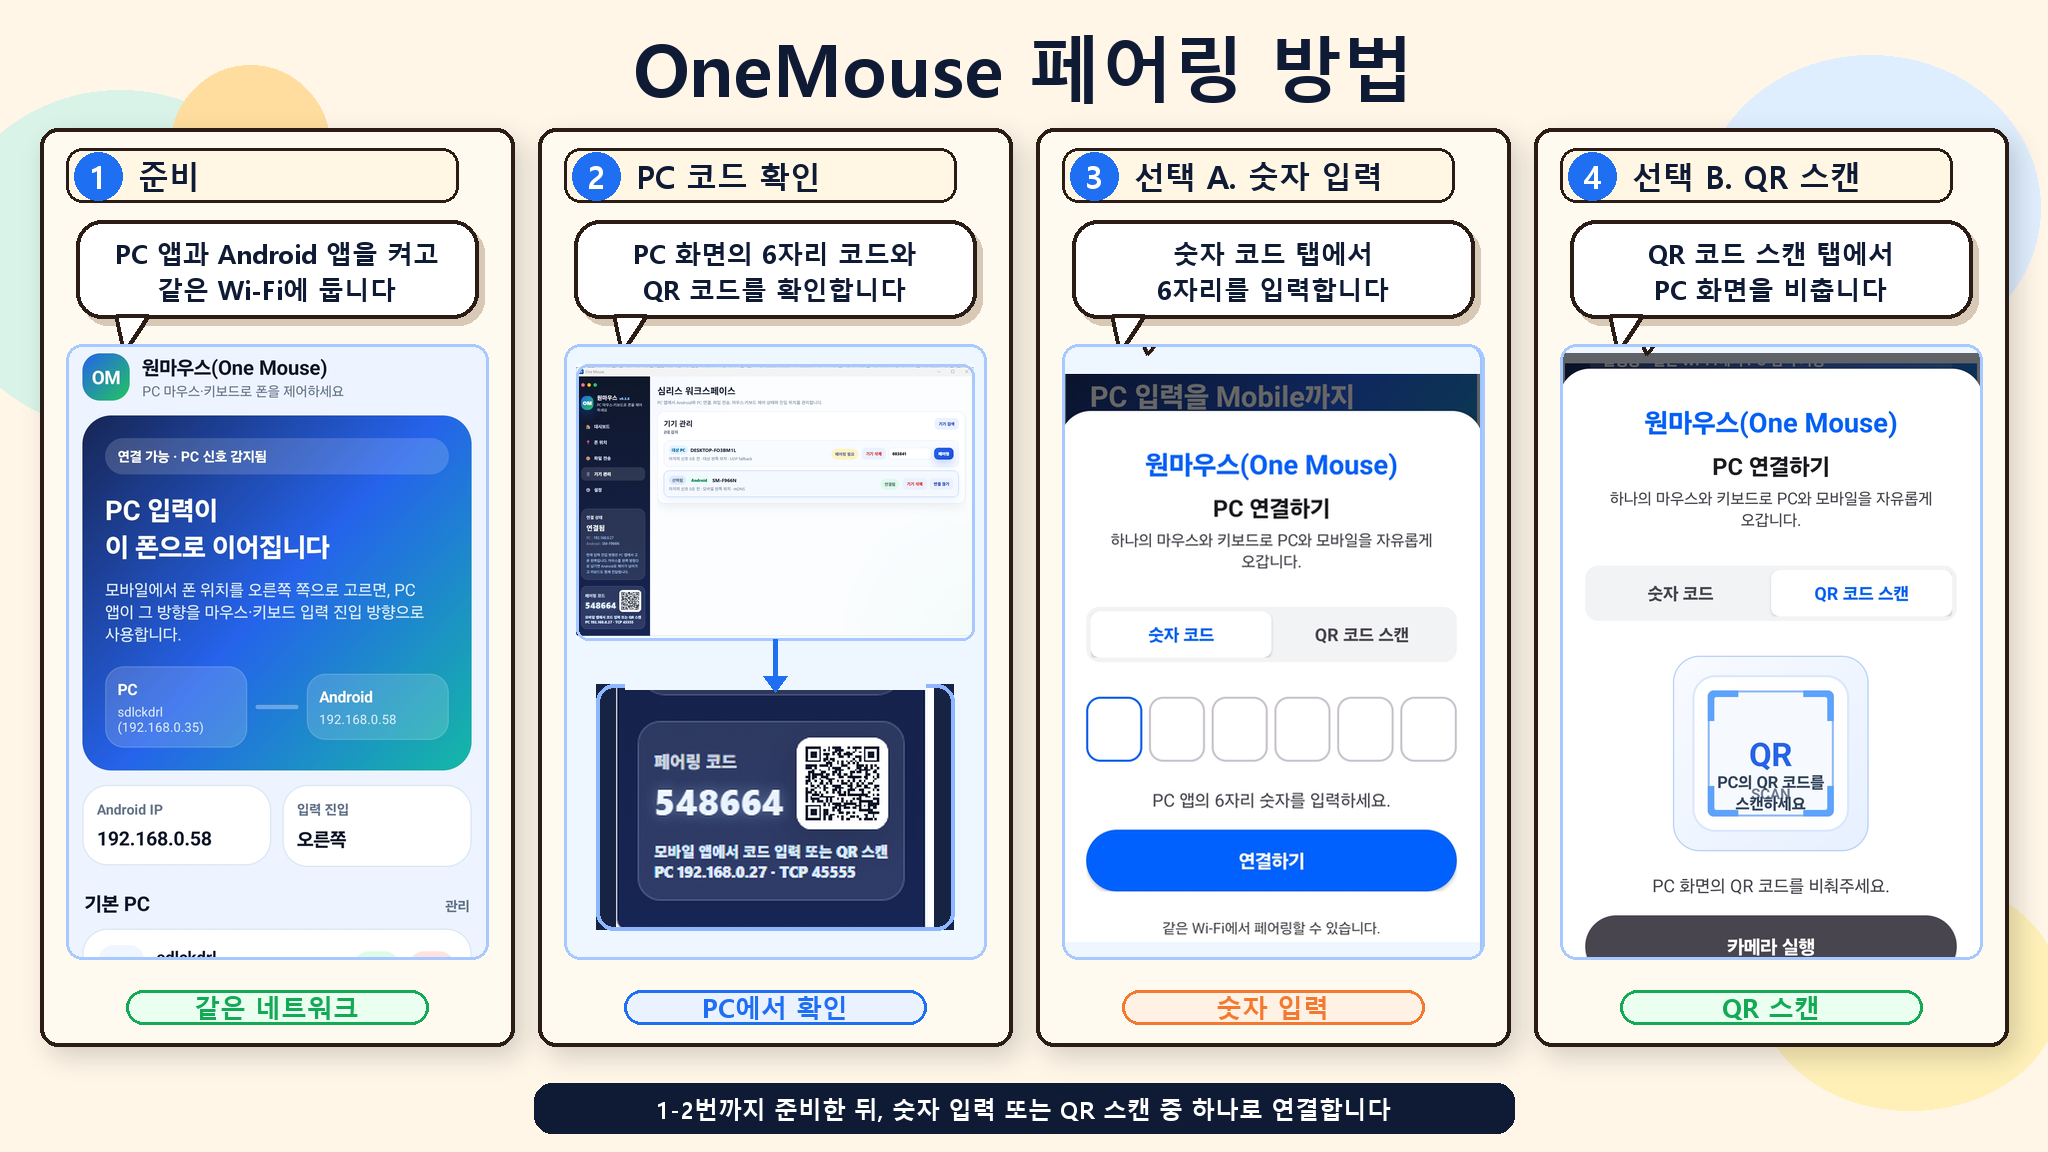
Run OneMouse on Windows and a 6-digit code and a QR code appear on screen.
Turn on the Android Accessibility Service
To receive mouse and keyboard input from the PC, turn on the OneMouse Accessibility Service on Android. In practice, this is the only thing you need to set up.
Search for your PC
Find the PC on the same Wi-Fi (the same router). On Android 13 and up, you may be asked once for the "nearby Wi-Fi devices" permission at this point.
Pair with the QR or 6-digit code
Scan the QR code or enter the 6-digit code to confirm it's your device. Once pairing is done, the input, file, and clipboard channels open.
Set your phone's position
Choose which edge of the PC screen (left, right, top, or bottom) leads to your phone, and arrange it to match the real direction. That edge is where the cursor crosses over.
Cross over and use it
Push the mouse toward the edge you set and it moves onto the phone. Drop files on the Quick Drop zone, and to reach another PC drag them across the screen boundary. For screen capture, use Print Screen or Ctrl+Alt+S.
See the real-UI pairing flowGet ready → check the PC code → enter the number → scan the QR
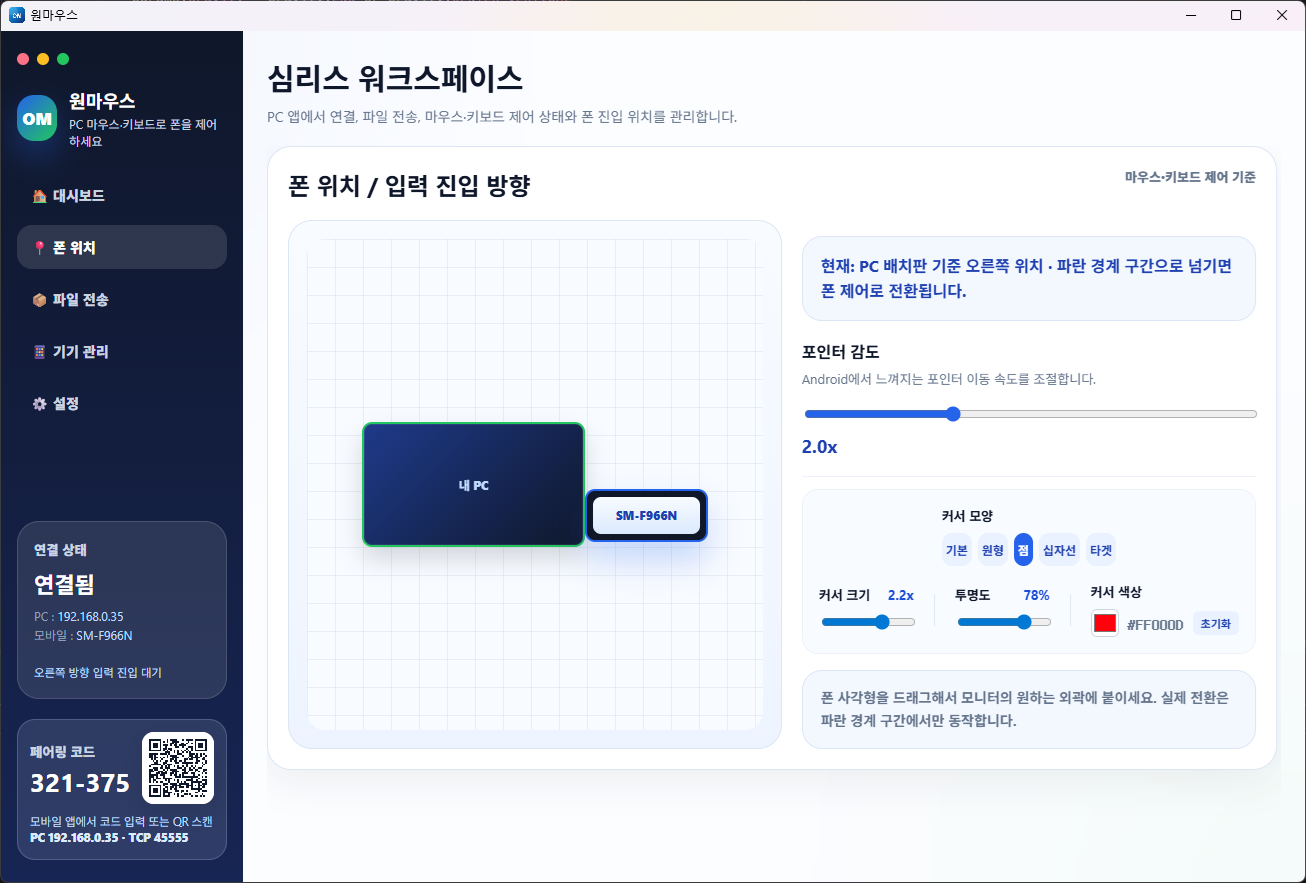
Phone position
After connecting, just match your phone's position to where it really is.
Decide which edge the mouse crosses over, then arrange it on the side where the phone actually sits (left, right, top, or bottom). Just like the arrangement demo on the home page, you drag your phone, tablet, or another PC into place in the app.
See the arrangement screen
Remote control
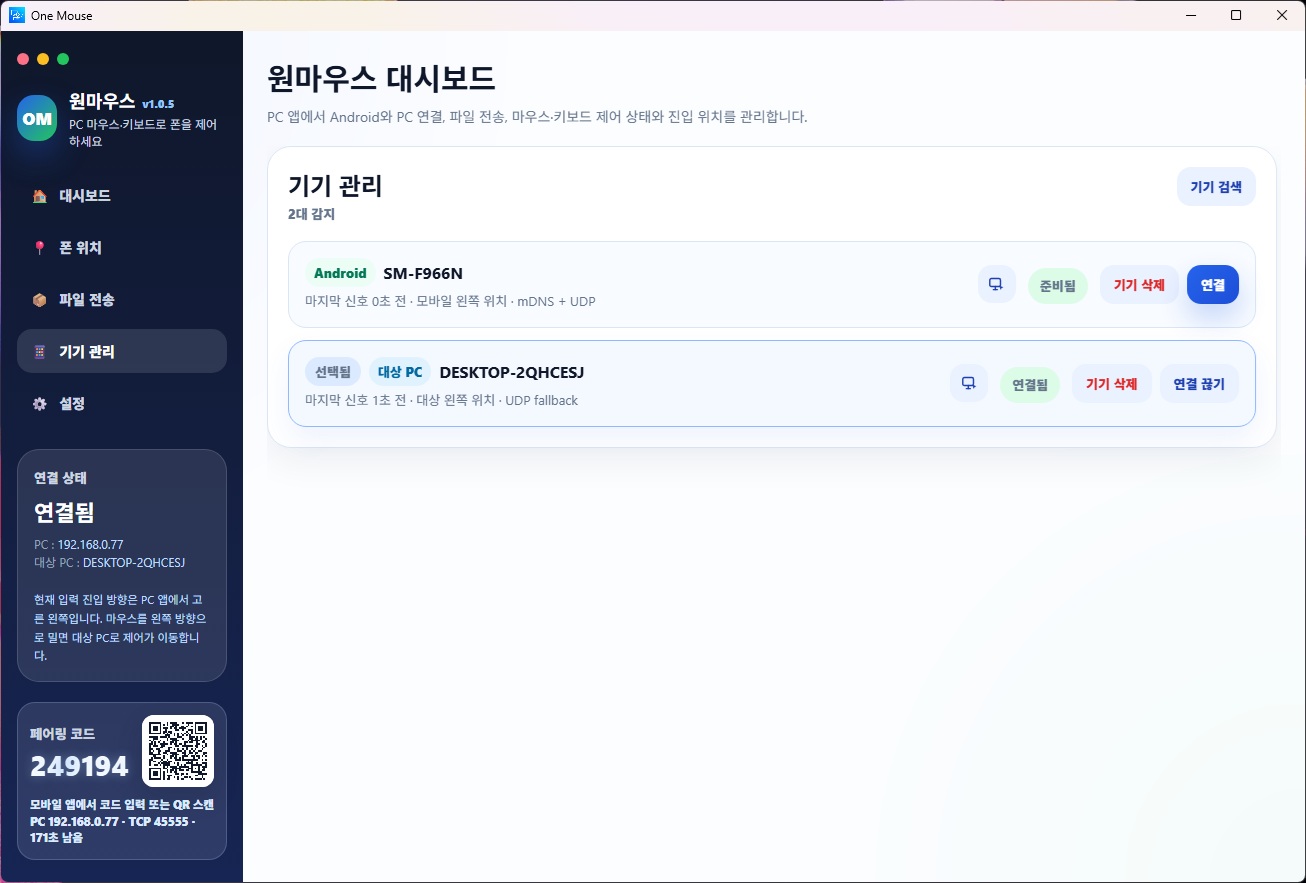
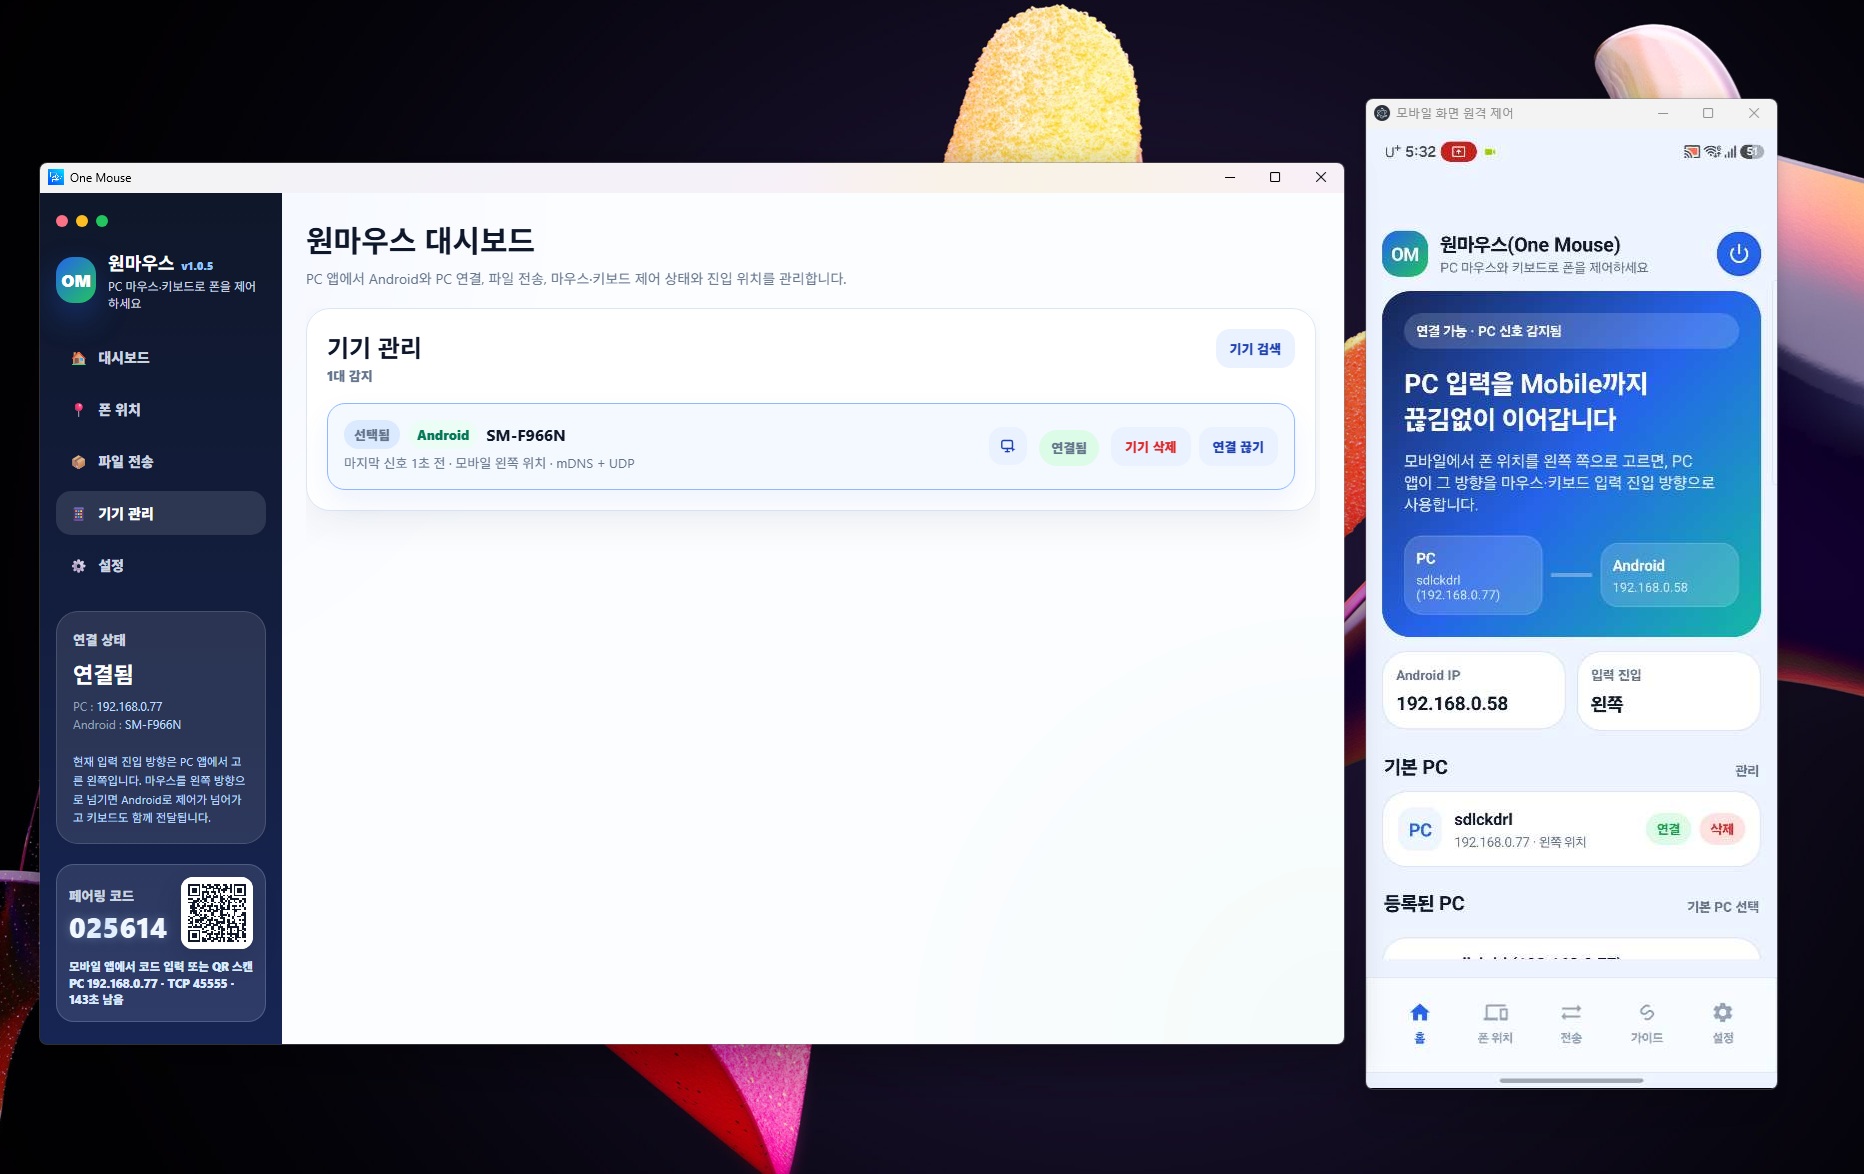
Mobile screen remote control starts from Devices.
In Devices, tap the remote control icon on the row of a paired Android, and a separate window opens showing the phone's screen. The first time you open it, Android screen capture approval is required.
Controls in the window
- Left click, drag, and wheel pass straight through.
- Right click = Back, wheel click = Home.
- Your PC keyboard — including IME and non-Latin input — goes to the phone's current text field.
- If the screen looks blank, check the capture approval pop-up and turn remote control off and on again.
The device row and icon
The open remote control window
Files & clipboard
Send files from the transfer screen, the Quick Drop zone, or a PC-to-PC drag.
- Drop files on the transfer screen or the small drop zone on top of your screen, and they go to the selected Android or sub PC.
- PC-to-PC: hold a file, drag it across the screen boundary you arranged, and drop it on the target PC to send it (the sub PC must be connected and arranged).
- Android → PC: send from the Android transfer tab or the share menu.
- If it won't start, check the connection status and the selected device.
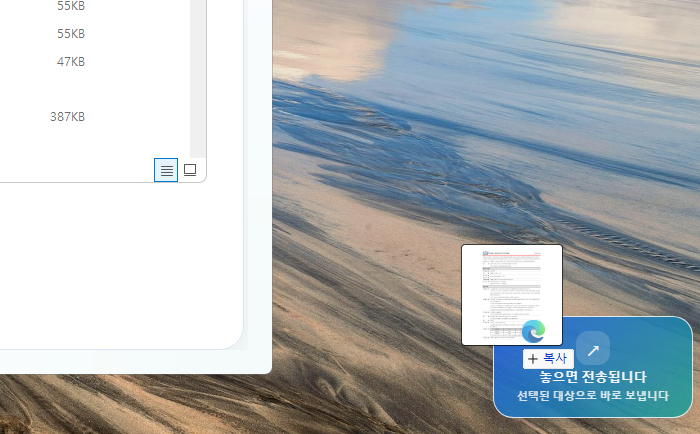
Quick Drop zone
- Press Ctrl+Alt+D to hide or show the drop zone.
- Its position and state are saved in the PC app.
The Quick Drop zone screen
Mobile to PC
Send files and selected text from your phone to your PC.
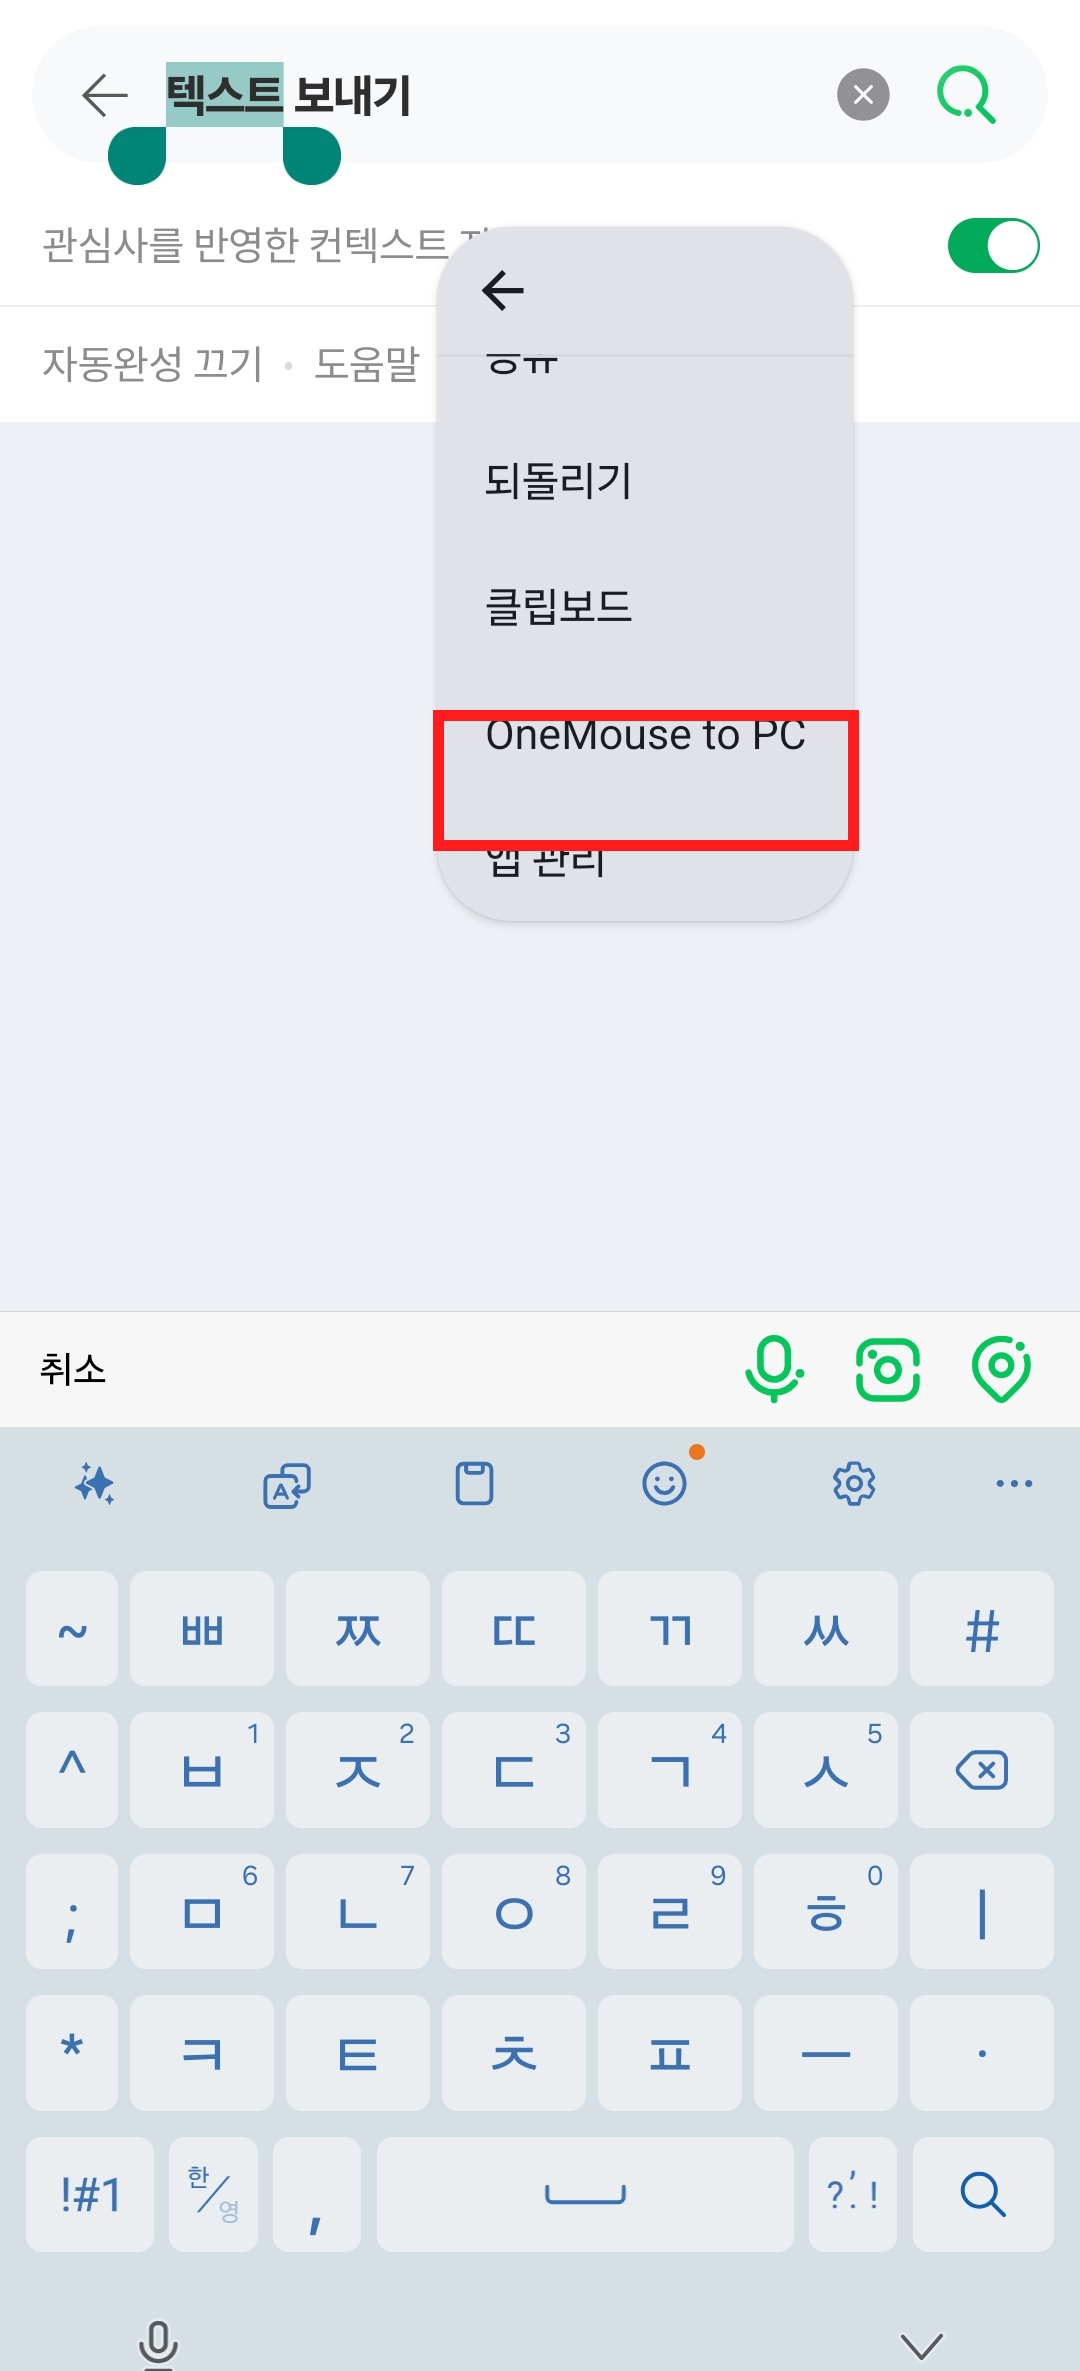
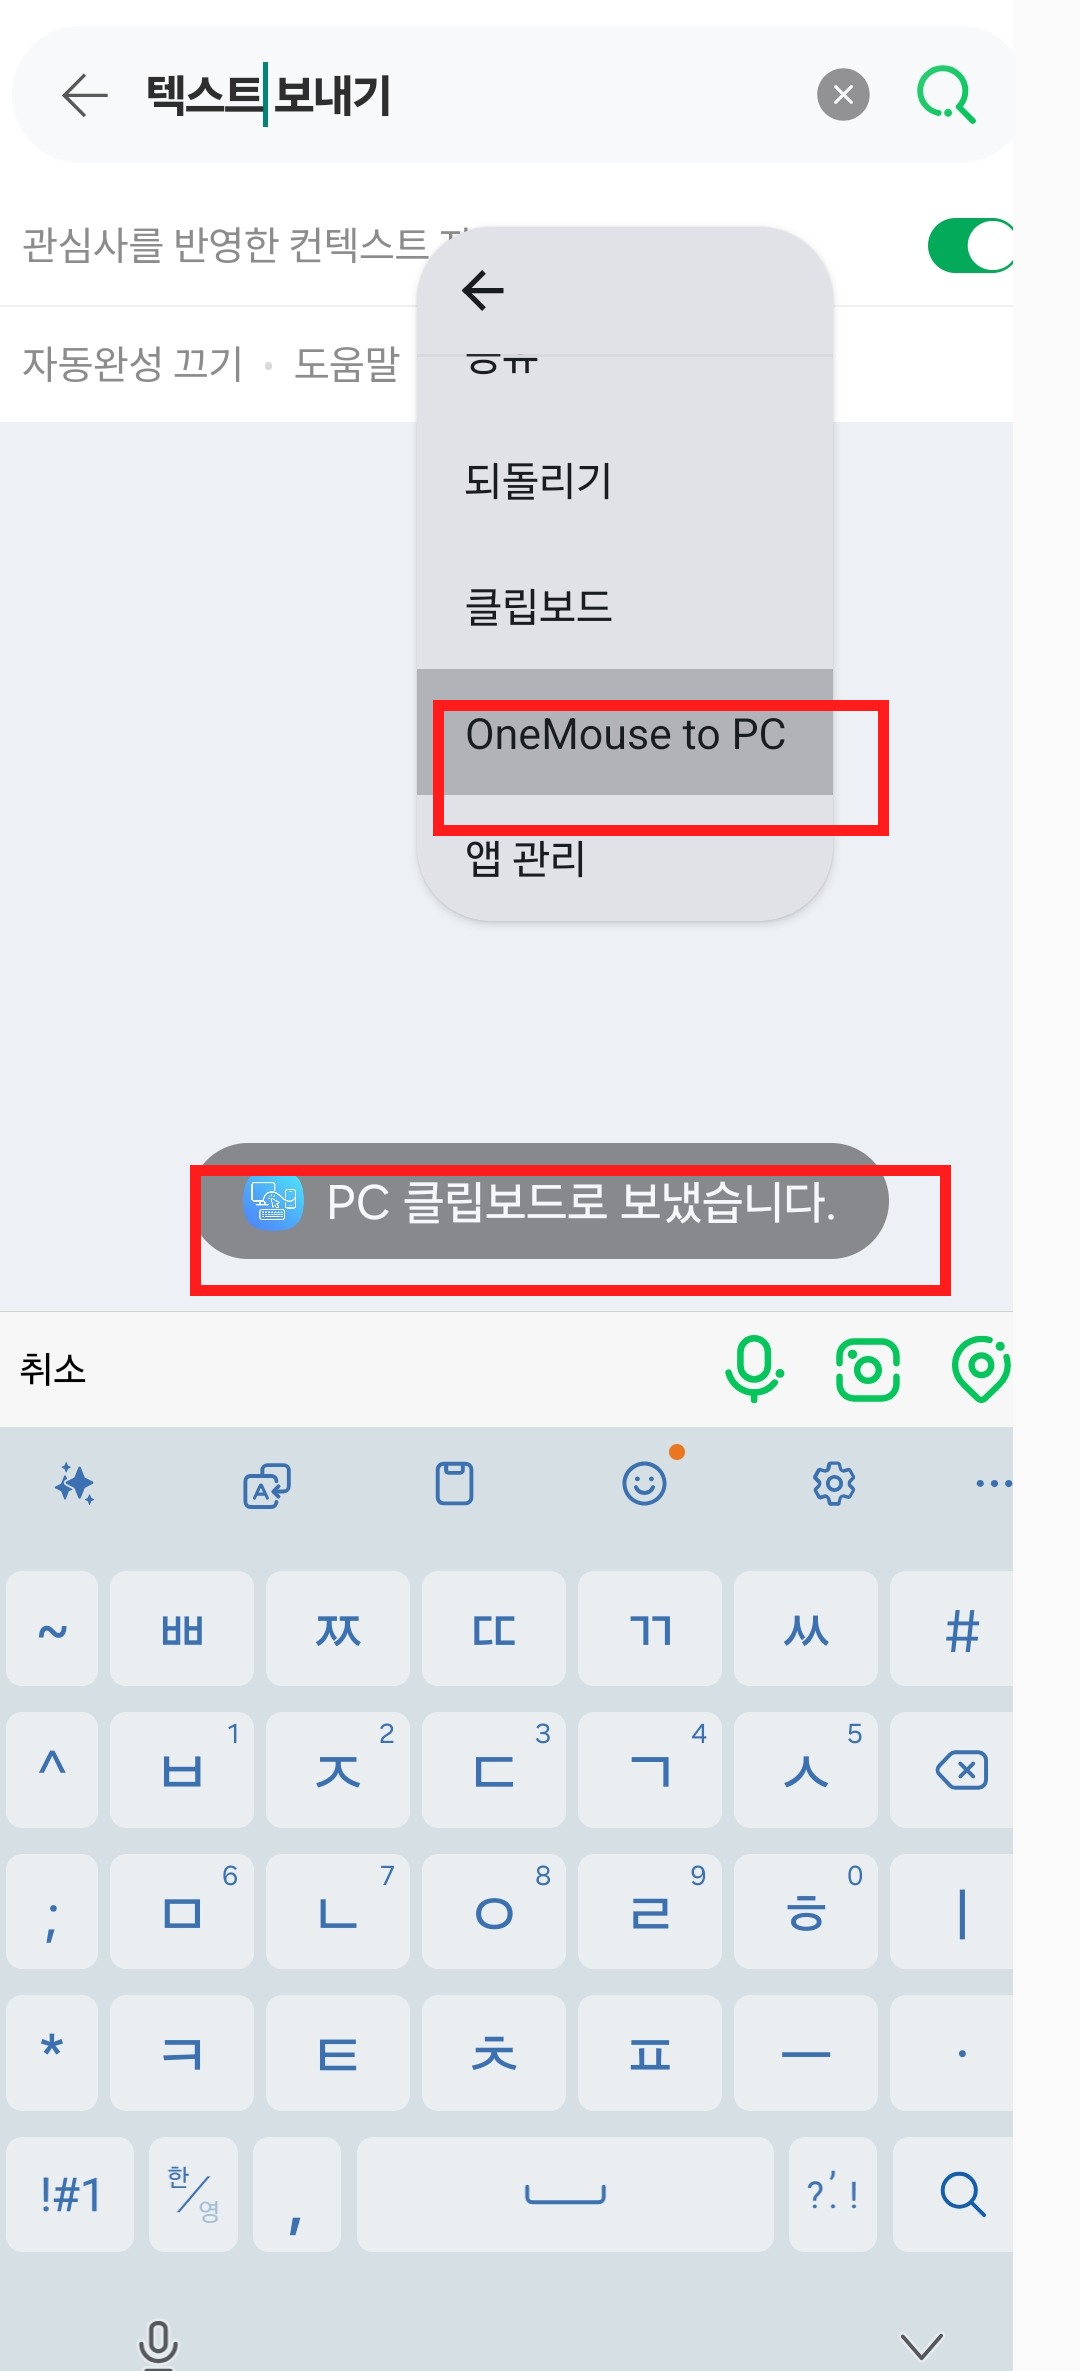
First make sure the phone is paired and connected to the PC. Send files from the transfer tab or Android's share menu, and send text through OneMouse to PC in the selection menu.
Send a file
- In the mobile app's Transfer tab, tap Choose files and send to PC.
- Select the files and they are sent to the currently selected PC.
- From a photo or document app, you can also choose Share and select OneMouse.
Send text
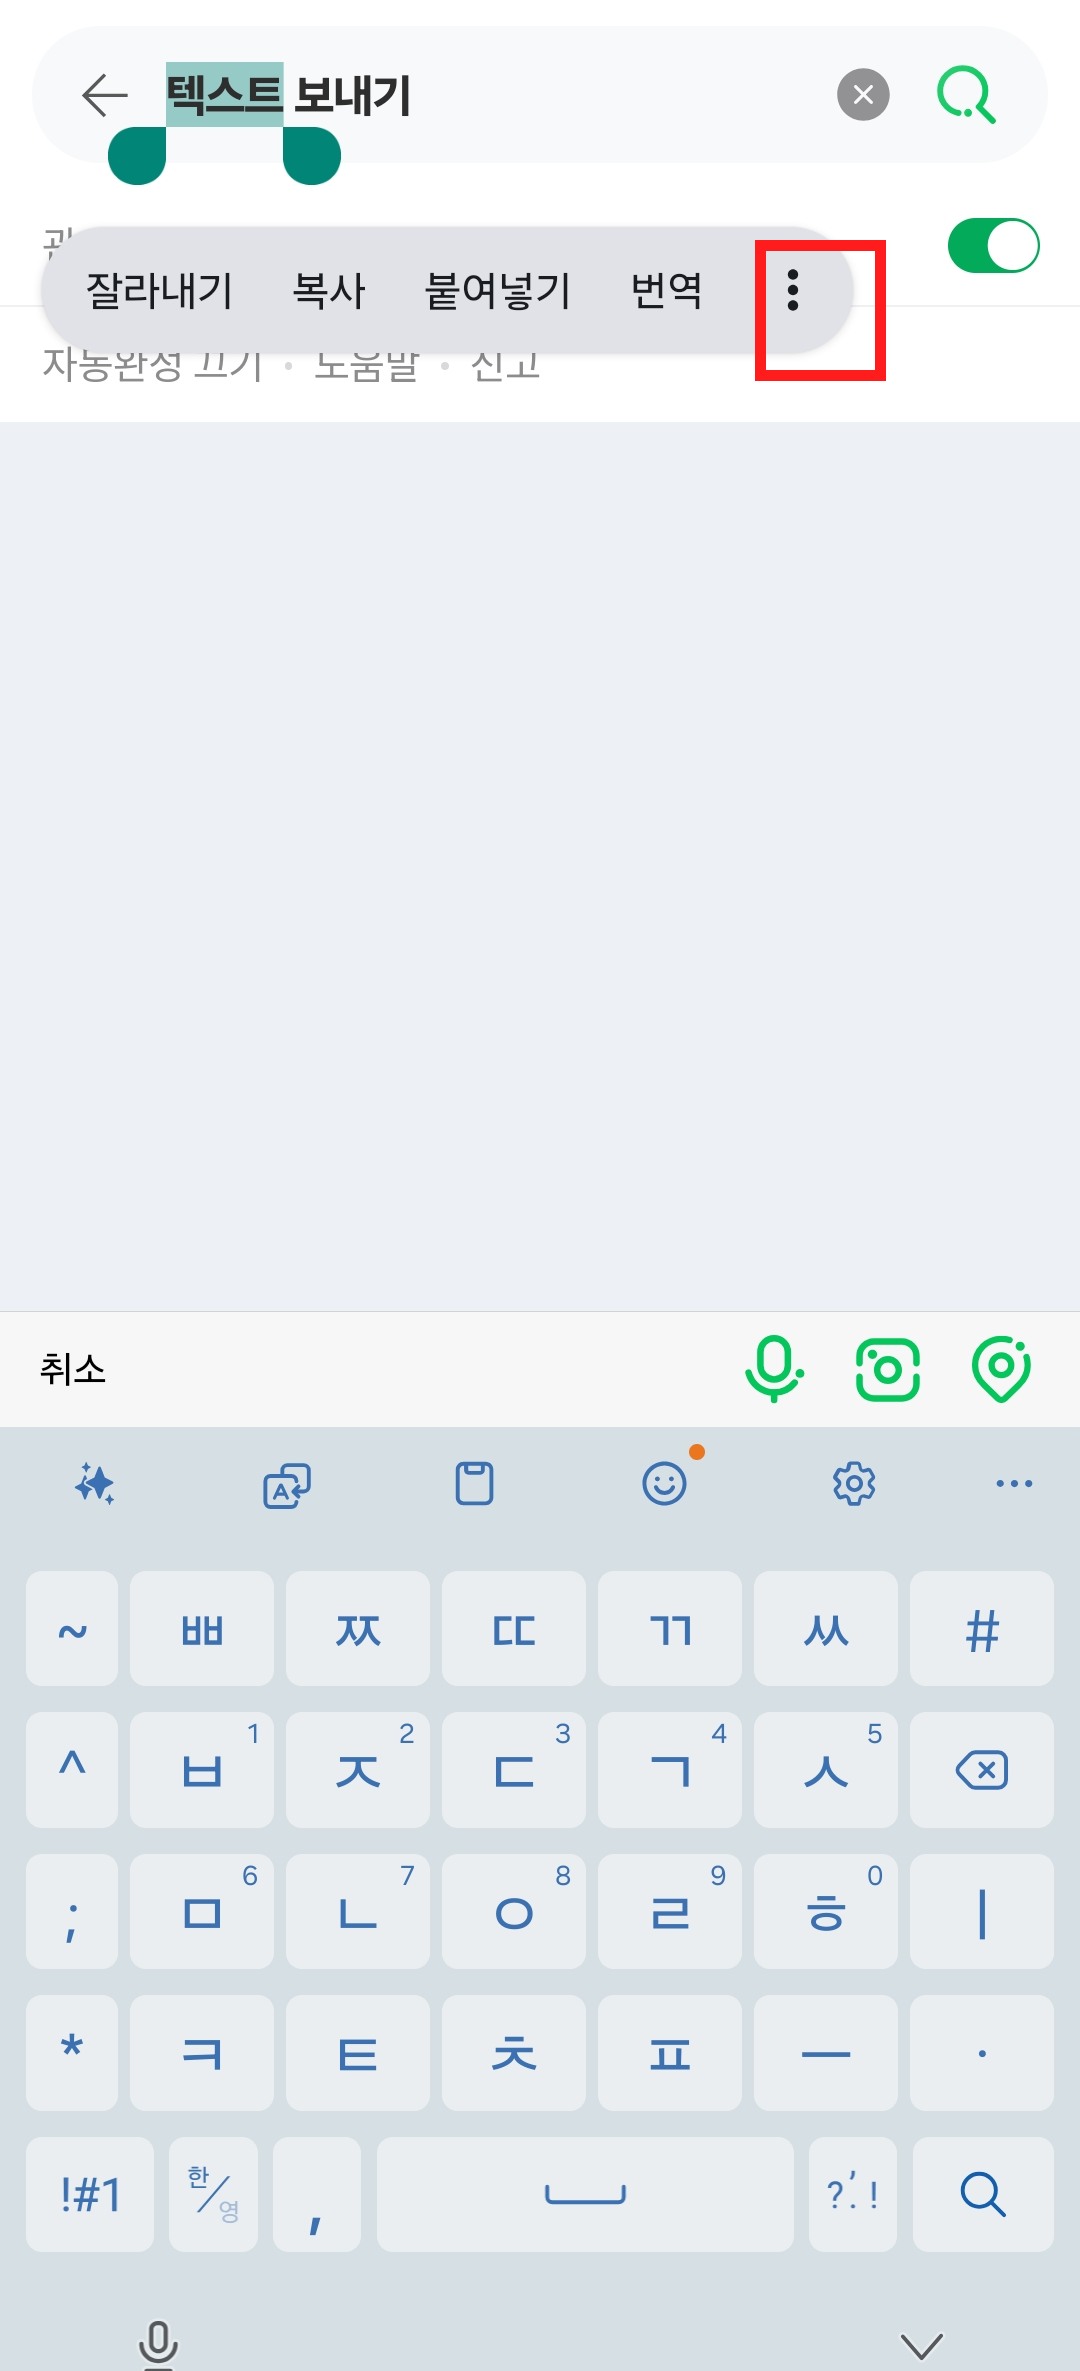
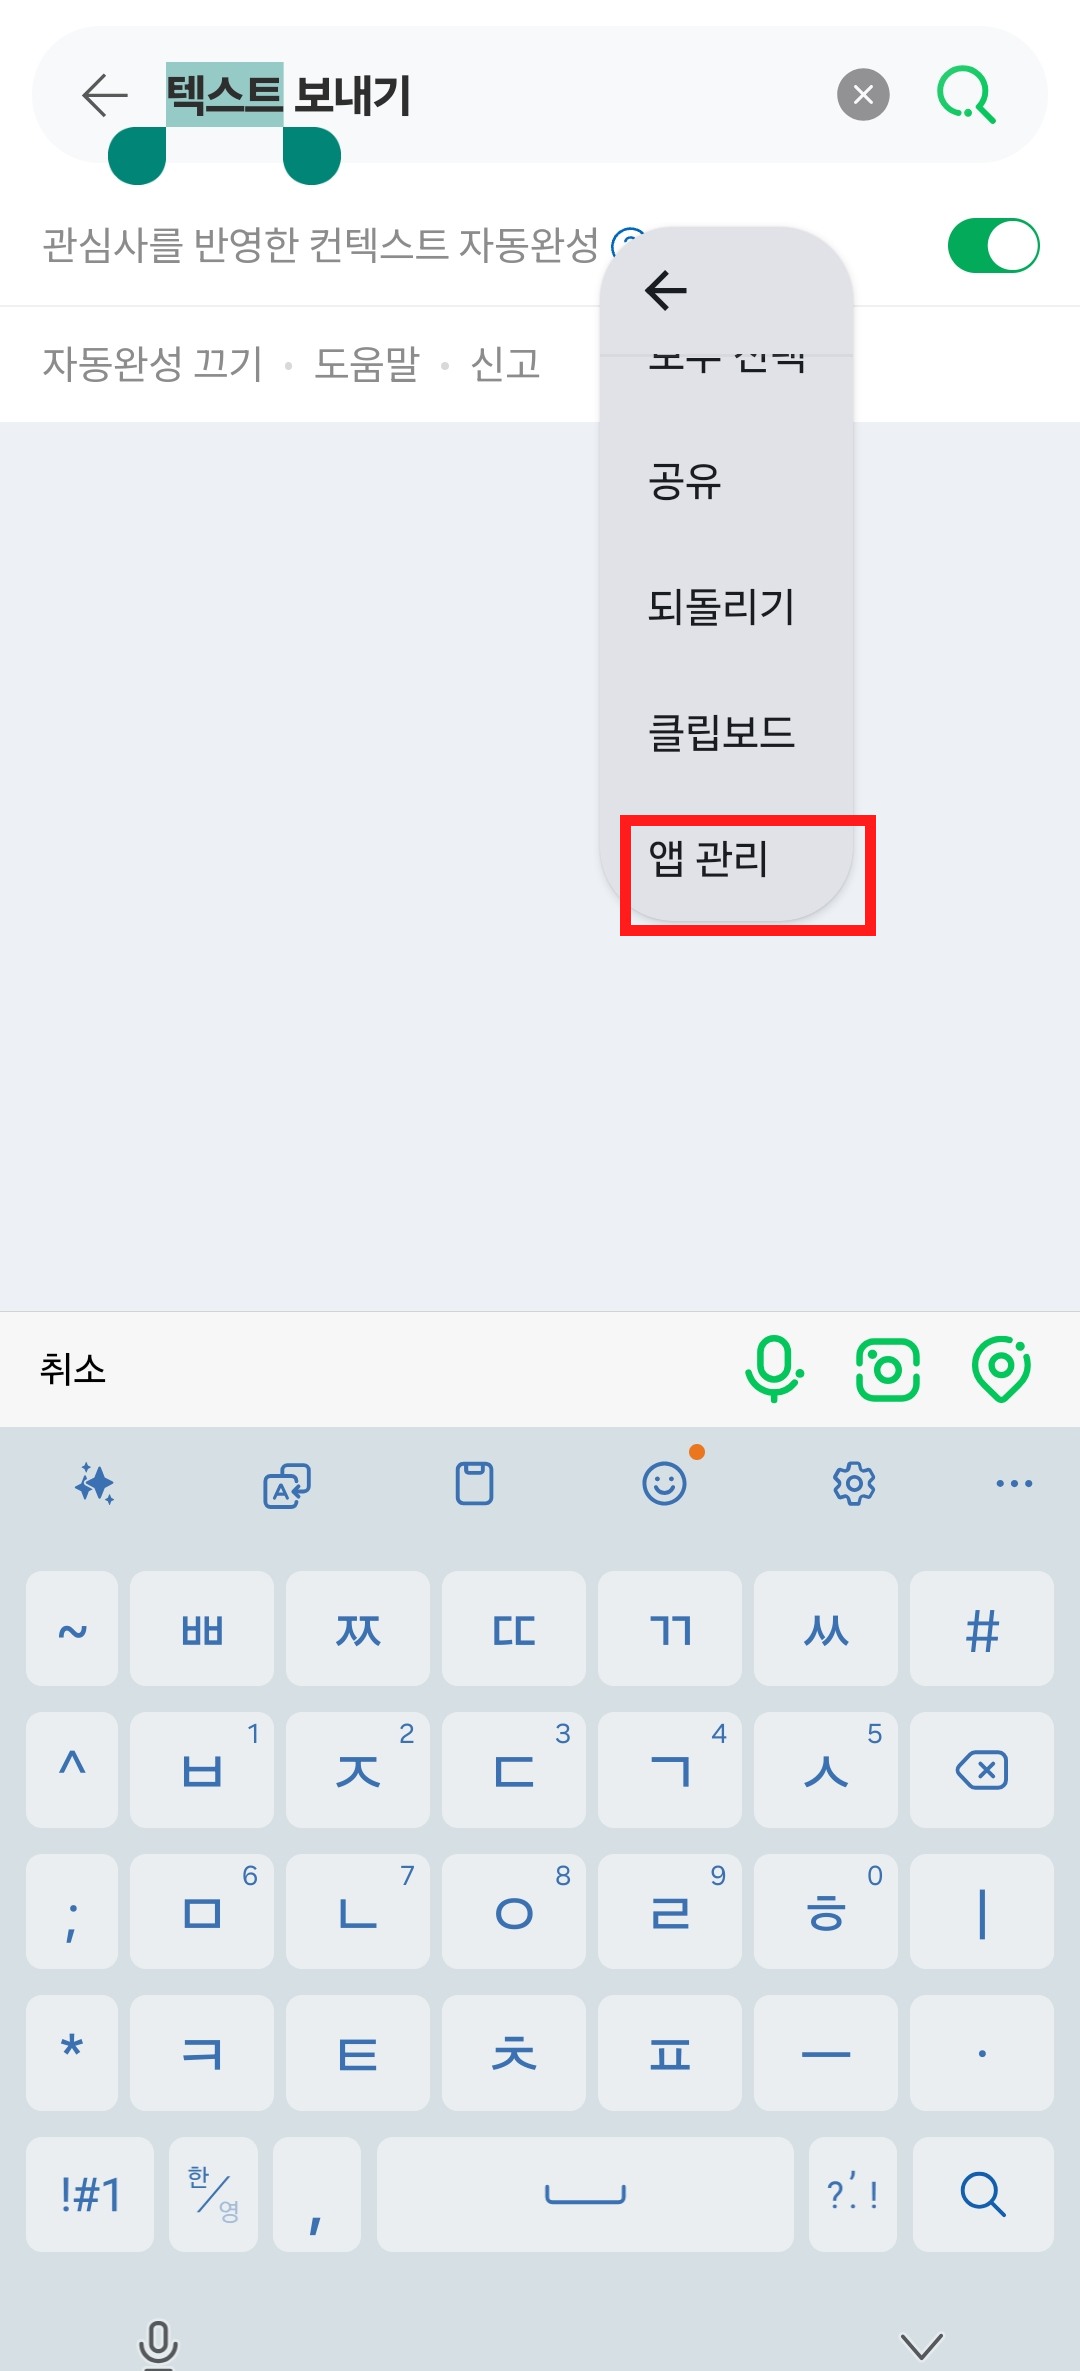
- Long-press text on Android, select it, then open More.
- Tap OneMouse to PC to copy it to the PC clipboard.
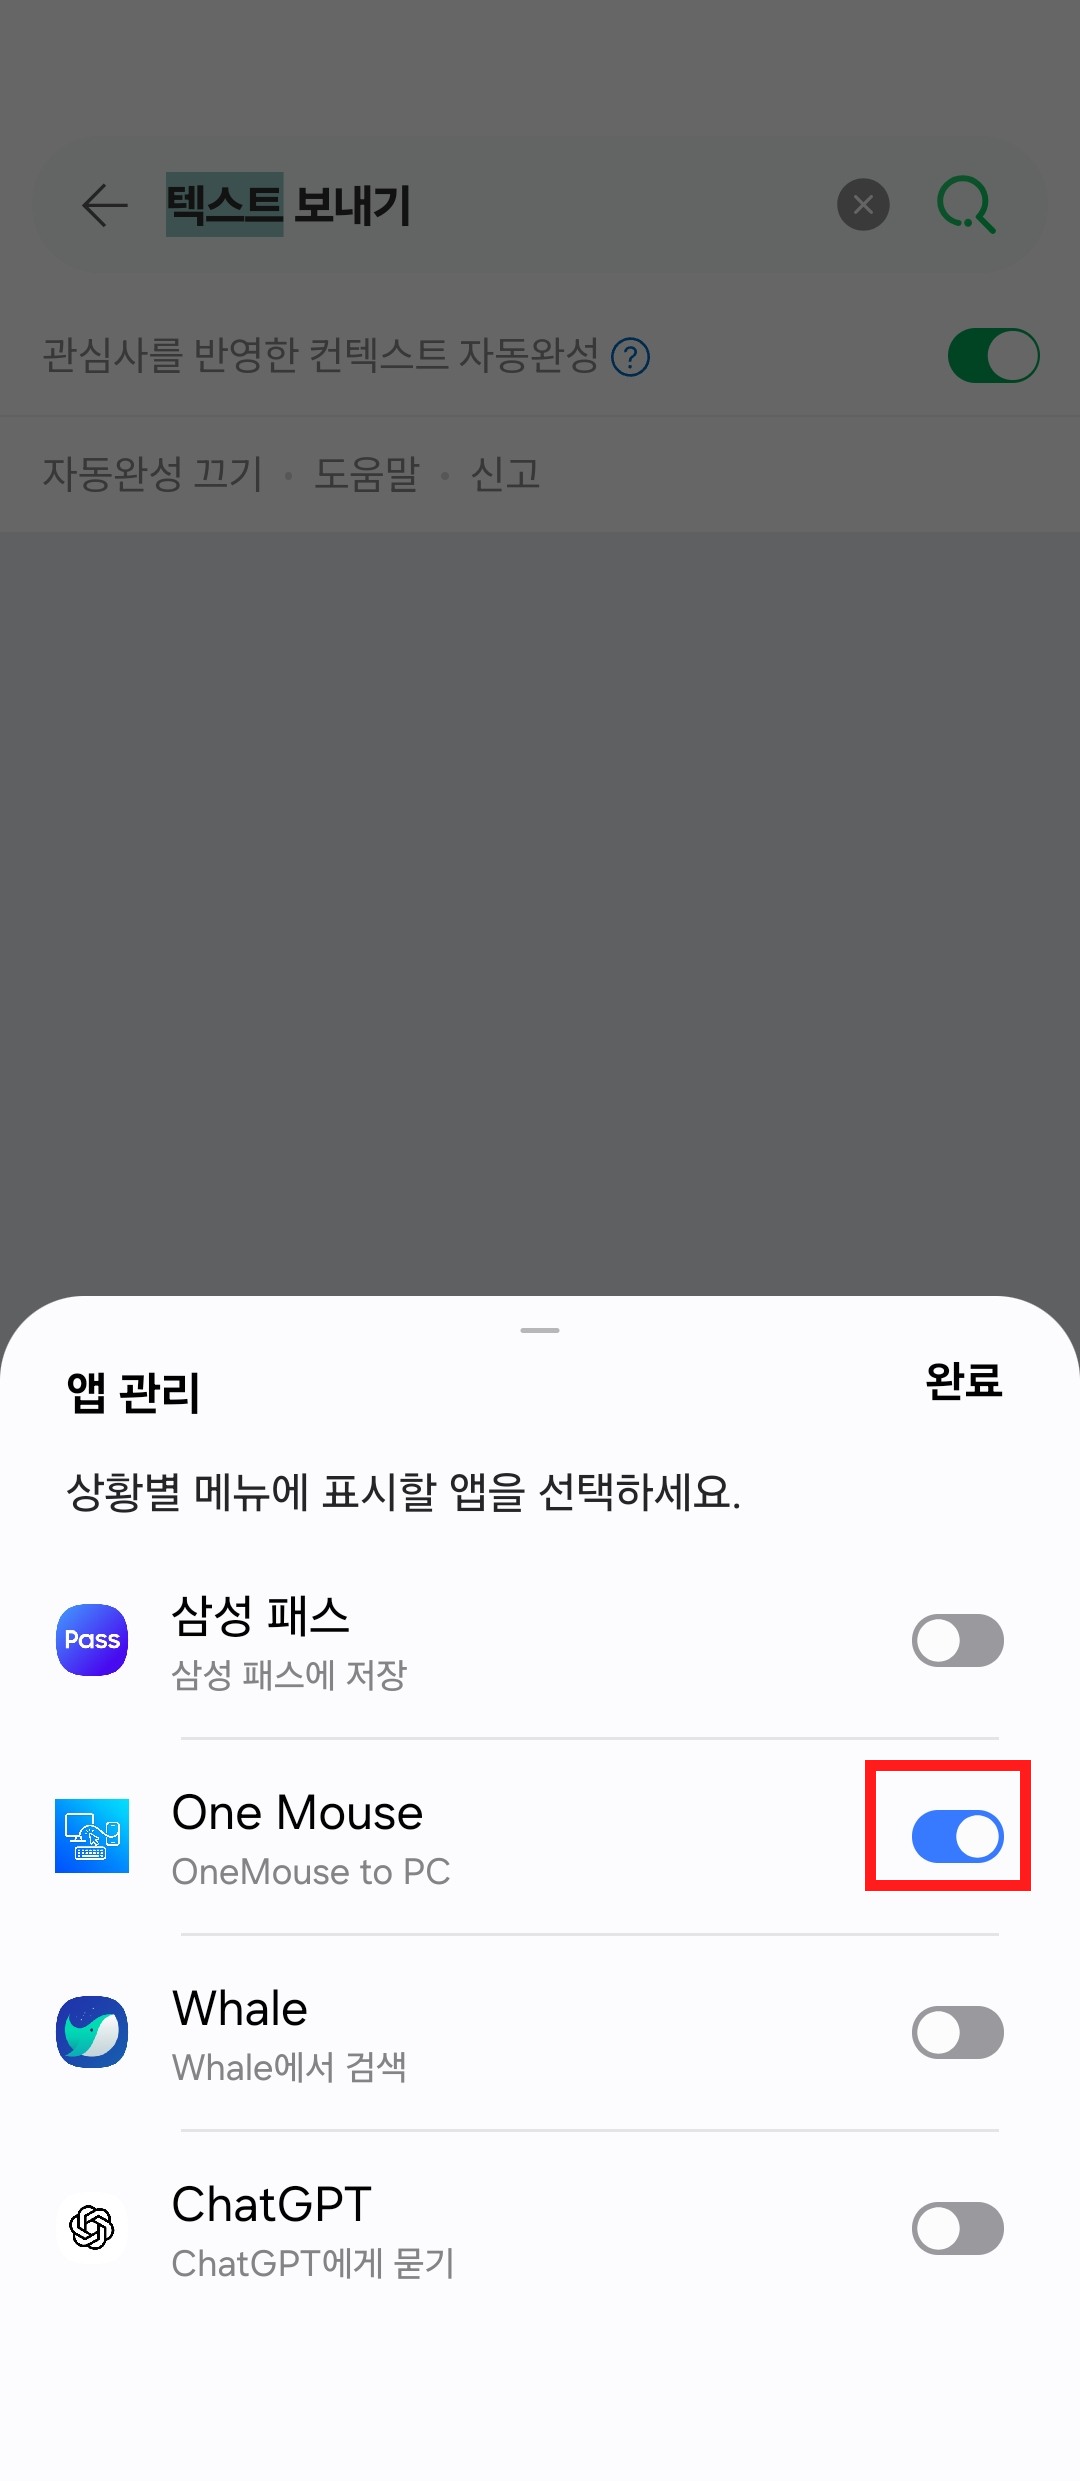
- If it is missing the first time, turn on OneMouse once in app management, then select it again.
See the text-transfer screensHow to enable and use OneMouse to PC from Android's selection menu.
Number shortcuts
Connect instantly with the number from your device list.
Ctrl + Alt + 1~9
- The first 9 devices in Devices get Ctrl+Alt+1~9.
- Press a number to connect to that device.
- Press the number of an already-connected device again to disconnect.
- A small notification appears at the bottom right when you connect or disconnect.
Auto-reconnect
- When on, the PC app reconnects automatically when your last device reappears or when only one device is ready.
- No separate notification appears as the mouse moves between devices.
Bluetooth
You can also connect over Bluetooth, without a router.
Link PC↔Android and PC↔PC directly over Bluetooth to exchange input, clipboard, and files. No Wi-Fi router or internet required.
Great when
- You're in a room, outdoors, or in a car with no shared Wi-Fi
- Guest Wi-Fi or a firewall blocks device discovery
- You mostly do light keyboard and clipboard work
Good to know
- Turn it on from the Android settings tab; it works independently of Wi-Fi (with retry backoff).
- PC↔PC supports two-way file drag with main / sub roles.
- You can turn on several Bluetooth devices from the list at once.
- Bluetooth is slower than Wi-Fi — for large files, use Wi-Fi.
- Mobile remote control is not recommended over Bluetooth.
- If you run into trouble, pair again from Windows Bluetooth.
Connection order
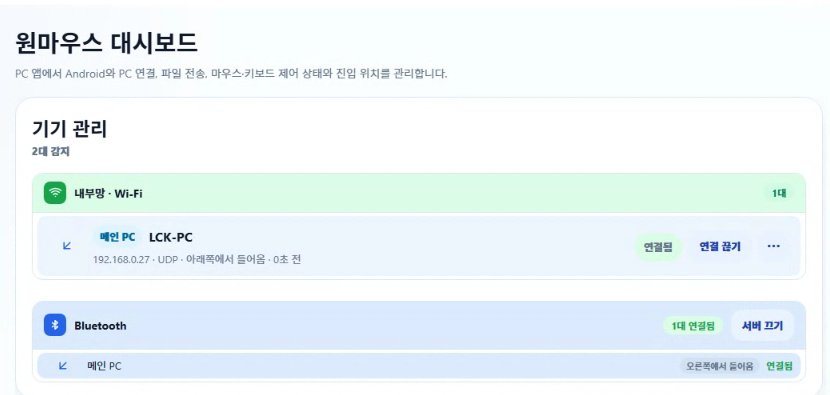
Turn on Bluetooth mode in the Android settings tab
Pair the phone once in Windows Bluetooth settings
The PC app auto-connects → shown in Devices
Use input, clipboard, and files just like Wi-Fi
The Bluetooth sub device screen
Another PC
Link another Windows PC in this order: Settings · Devices · arrangement.
Connecting
- The controlling PC is the main, and the controlled PC is the sub.
- Pair the sub PC to add it to Devices.
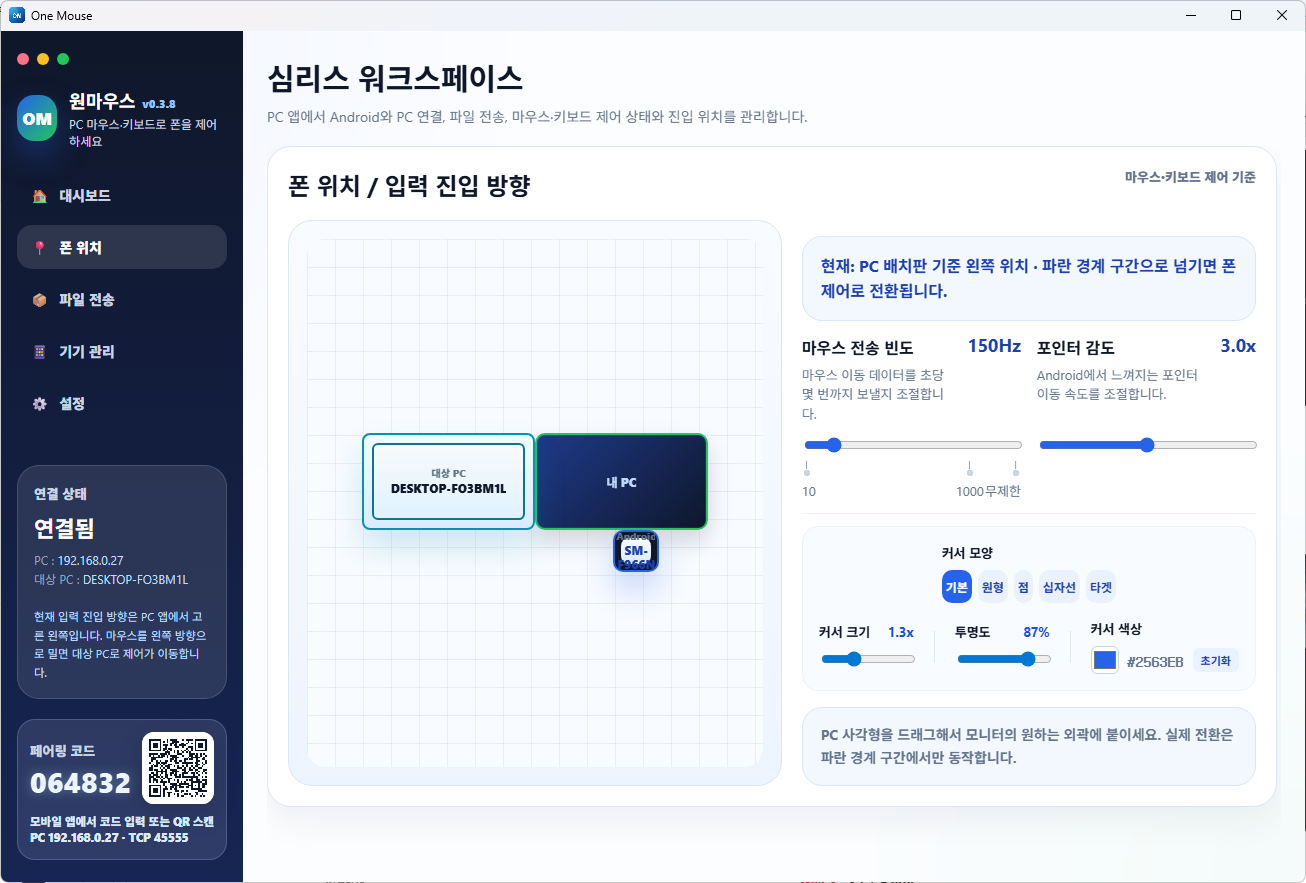
- In the layout editor, place the sub PC where it really sits.
- Move the mouse in that direction to control the other PC, and exchange files by dragging across the boundary.
The arrangement screen
Permissions
Only Accessibility is required; the rest are per feature.
Permissions aren't all requested at once — they're asked for when you use the feature. Detailed notes on each item are in Technical & Security.
- Accessibility Service — required: needed for Android control and for screen capture and remote input.
- Screen capture approval — when remote control starts: approved through an Android system pop-up.
- Nearby Wi-Fi devices — when connecting: may be requested once on Android 13+ while finding the PC.
- Notifications, system settings, battery exception: only when needed — for showing service status, adjusting brightness, and stability after the screen turns off, respectively.
Shortcuts
The keyboard shortcuts you'll use most.
| Shortcut | Action |
|---|---|
| Ctrl+Alt+1~9 | Connect the matching device in the list / press again to disconnect |
| Ctrl+Alt+D | Hide / show the Quick Drop zone |
| Ctrl+Alt+S · PrintScreen | Capture the mobile screen |
| Ctrl+Alt+Backspace | Force the cursor back to your PC (center of the monitor) |
| Alt+Shift+↑/↓ | Adjust the mobile screen brightness (needs system settings permission) |